A compressor made with fridge technology!
A small compressor is quite useful in the home workshop. I use mine
mainly for spray painting, but many other uses exist. I built my
compressor from a sealed refrigerator motor/compressor, a discarded
freon container, a homemade presostat, some junk box parts, and some
aluminium stock, plastic hoses, and the like.
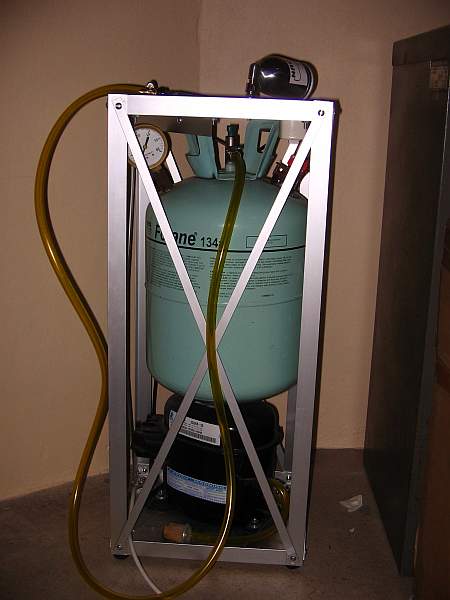
The first photo shows it a bit from above. It has a very small
footprint, and is a little bit lower than a normal table, so that it
can either be pushed under a table, or its surface can be used as a
little table, such as for putting down the spray gun. This little
surface has a border, so that little parts won't fall off.
From the front you can better see all the parts. Basically these are
the fridge motor/compressor, the freon tank, filter, presostat,
pressure gauge, switch, hoses, wires, and mechanical structure
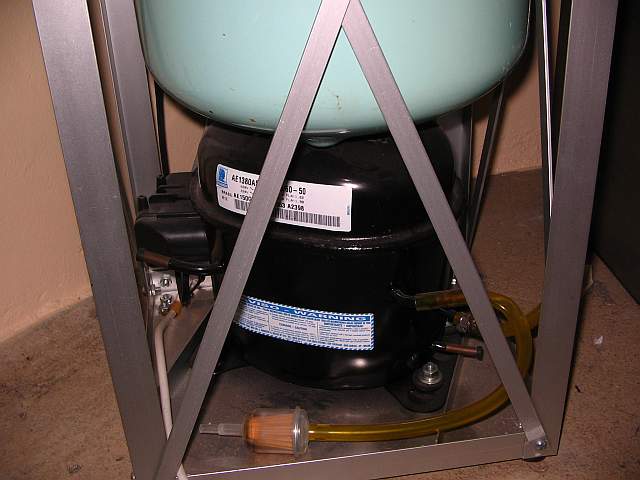
The air enters the compressor through a small universal fuel filter,
used as air filter here. After all, we don't want any dust in the
compressor nor in teh exhaust air! From the output of the compressor
unit, a hose runs up and feeds the tank from above. Most of
the oil blown out by the compressor remains in the hose during work,
and eventually seeps back into the compresor while it is not
pressurized. The inlet nipple is mounted in such a
position on the tank that any small oil particles coming in will
collect in the bottom of the tank, rather than being delivered to the
outflow.
The oil circulation stubs of the compressor unit are not used, and
remain plugged.
The tank hangs from the top aluminium plate. Its original valve and
outlet serve for the same purpose as intended by the tank's
manufacturer. The inlet nipple, presostat and pressure gauge were
installed by drilling holes into the tank, and soldering the proper
parts to it, using common plain tin/lead solder.
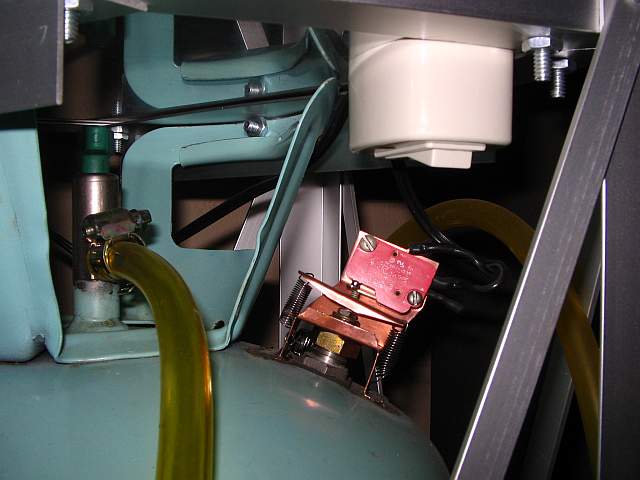
The power switch (white) is within easy reach under the top plate, but
out of range for falling stuff or accidental activation.
The electrical circuit is simple: The power switch and presostat are
wired in series with the motor and fed from the power cable, which is
has three conductors to properly ground the frame of the machine, tank
and compressor housing.
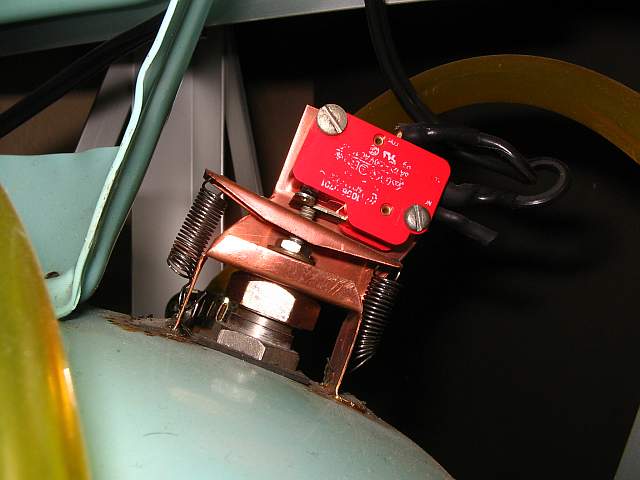
The presostat is the only slightly more elaborate part. It uses a
microswitch, mounted to a copper sheet structure. I used copper because
I had it on hand and it solders easily, but zinc-plated or tin-plated
steel would be fine too. The structure is soldered to the tank. A 10mm
hole in the tank is covered by a piece of rubber coming from a bicycle
inner tube, which acts as membrane. A thick perforated bolt and nut is
used to push the rubber down onto the tank and seal it. Inside that
bolt there is a thin bolt, its head resting on the rubber membrane, and
its tip touching the lever of the microswitch. A crossbar is tensioned
down with two homemade springs, and presses the thin bolt down via a
nut whose position can be adjusted, to vary the spring tension. This is
used to adjust the device to act on the desired pressure.
As the pressure in the tank rises, the rubber membrane bulges out,
lifting the bolt, stretching the springs, and finally making the switch
shut off the current. As the pressure goes down, the bolt will move a
little down again, and the switch reconnects power to the motor.
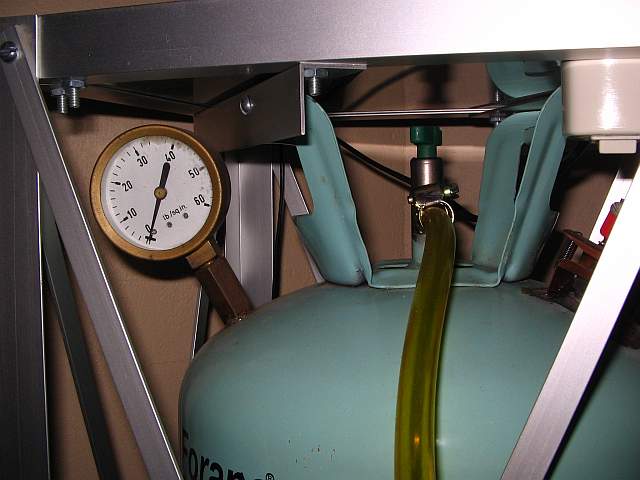
The nipple for the pressure gauge was soldered over a little hole in
the tank, and the gauge screwed in using a little teflon tape. I got
this gauge for free, because it's labelled only in lb/sq.in., and
nobody wants these obsolete things here anymore. The gauge rests in a
protected position, but still easy enough to see.
I set the presostat to 2 bar, which is a tad less than half scale on
this gauge. That pressure works well for spray painting with the gun
shown, and also with a larger low pressure gun. I would not be
comfortable using such a recycled freon container for much higher
pressure. When new, it surely will be able to survive much higher
pressure, but some water builds up inside, and probably these
containers are not rust-proofed inside, so I expect it to rip open on
the bottom some day. The lower the pressure, the less dangerous that
will be.
In the event of presostat malfunction (so far has never happened), the
hose should fly off the fridge compressor outled, which is not barbed.
I tightened the clamp there only enough to keep the hose from flying
off at normal working pressure. By the way, the hoses are universal
cheap fuel lines. Nothing stronger is needed at this level of pressure.
The outlet valve is a bit awkward to reach in that place, but it is
rarely used anyway. It's open most of the time.
If you copy this compressor, you have to be aware that freon containers
are intended to be single-use only, not for high pressure air, and that
refrigerator compressors use oil, so that tiny traces of oil could be
present in the air delivered by this compressor. In many cases that's
no problem, but in some it is. I haven't seen any problems in this
regard, so either the tank is doing a great job of collecting oil, or
the paints I use aren't sensitive to it (I use mostly lacquer on wood,
also some enamel on wood and metal).
The amount of air delivered by this contraption is plenty to run the
shown spray gun continuously, but a larger low pressure spray gun can
only be used with about a 50% duty cycle.
Back to the homo ludens
homepage.