Some of you might wonder why a charger is needed at all, to charge a 12 Volt battery from a 12 Volt source! Well, firstly the "12 Volt" source will typically vary anywhere from 11 Volt to 15 Volt, and then a battery needs a controlled charge current and voltage, which cannot result from connecting it directly to a voltage source.
The charger described here is intended for charging small 12 Volt lead acid batteries, such as the gelled or AGM batteries of capacities between about 2 and 10 Ah, using a car's electrical system as power source, regardless of whether the car engine is running or not.
I built this charger many years ago, I think I was still in school back then.
On request of a reader of my web site, I'm publishing it now, despite being a
rather crude circuit. It works, it is uncritical to build, and uses only
easy-to-find parts, so it has something in its favor. The downside is mainly the
low efficiency: This charger wastes about as much power as it puts into the
battery.

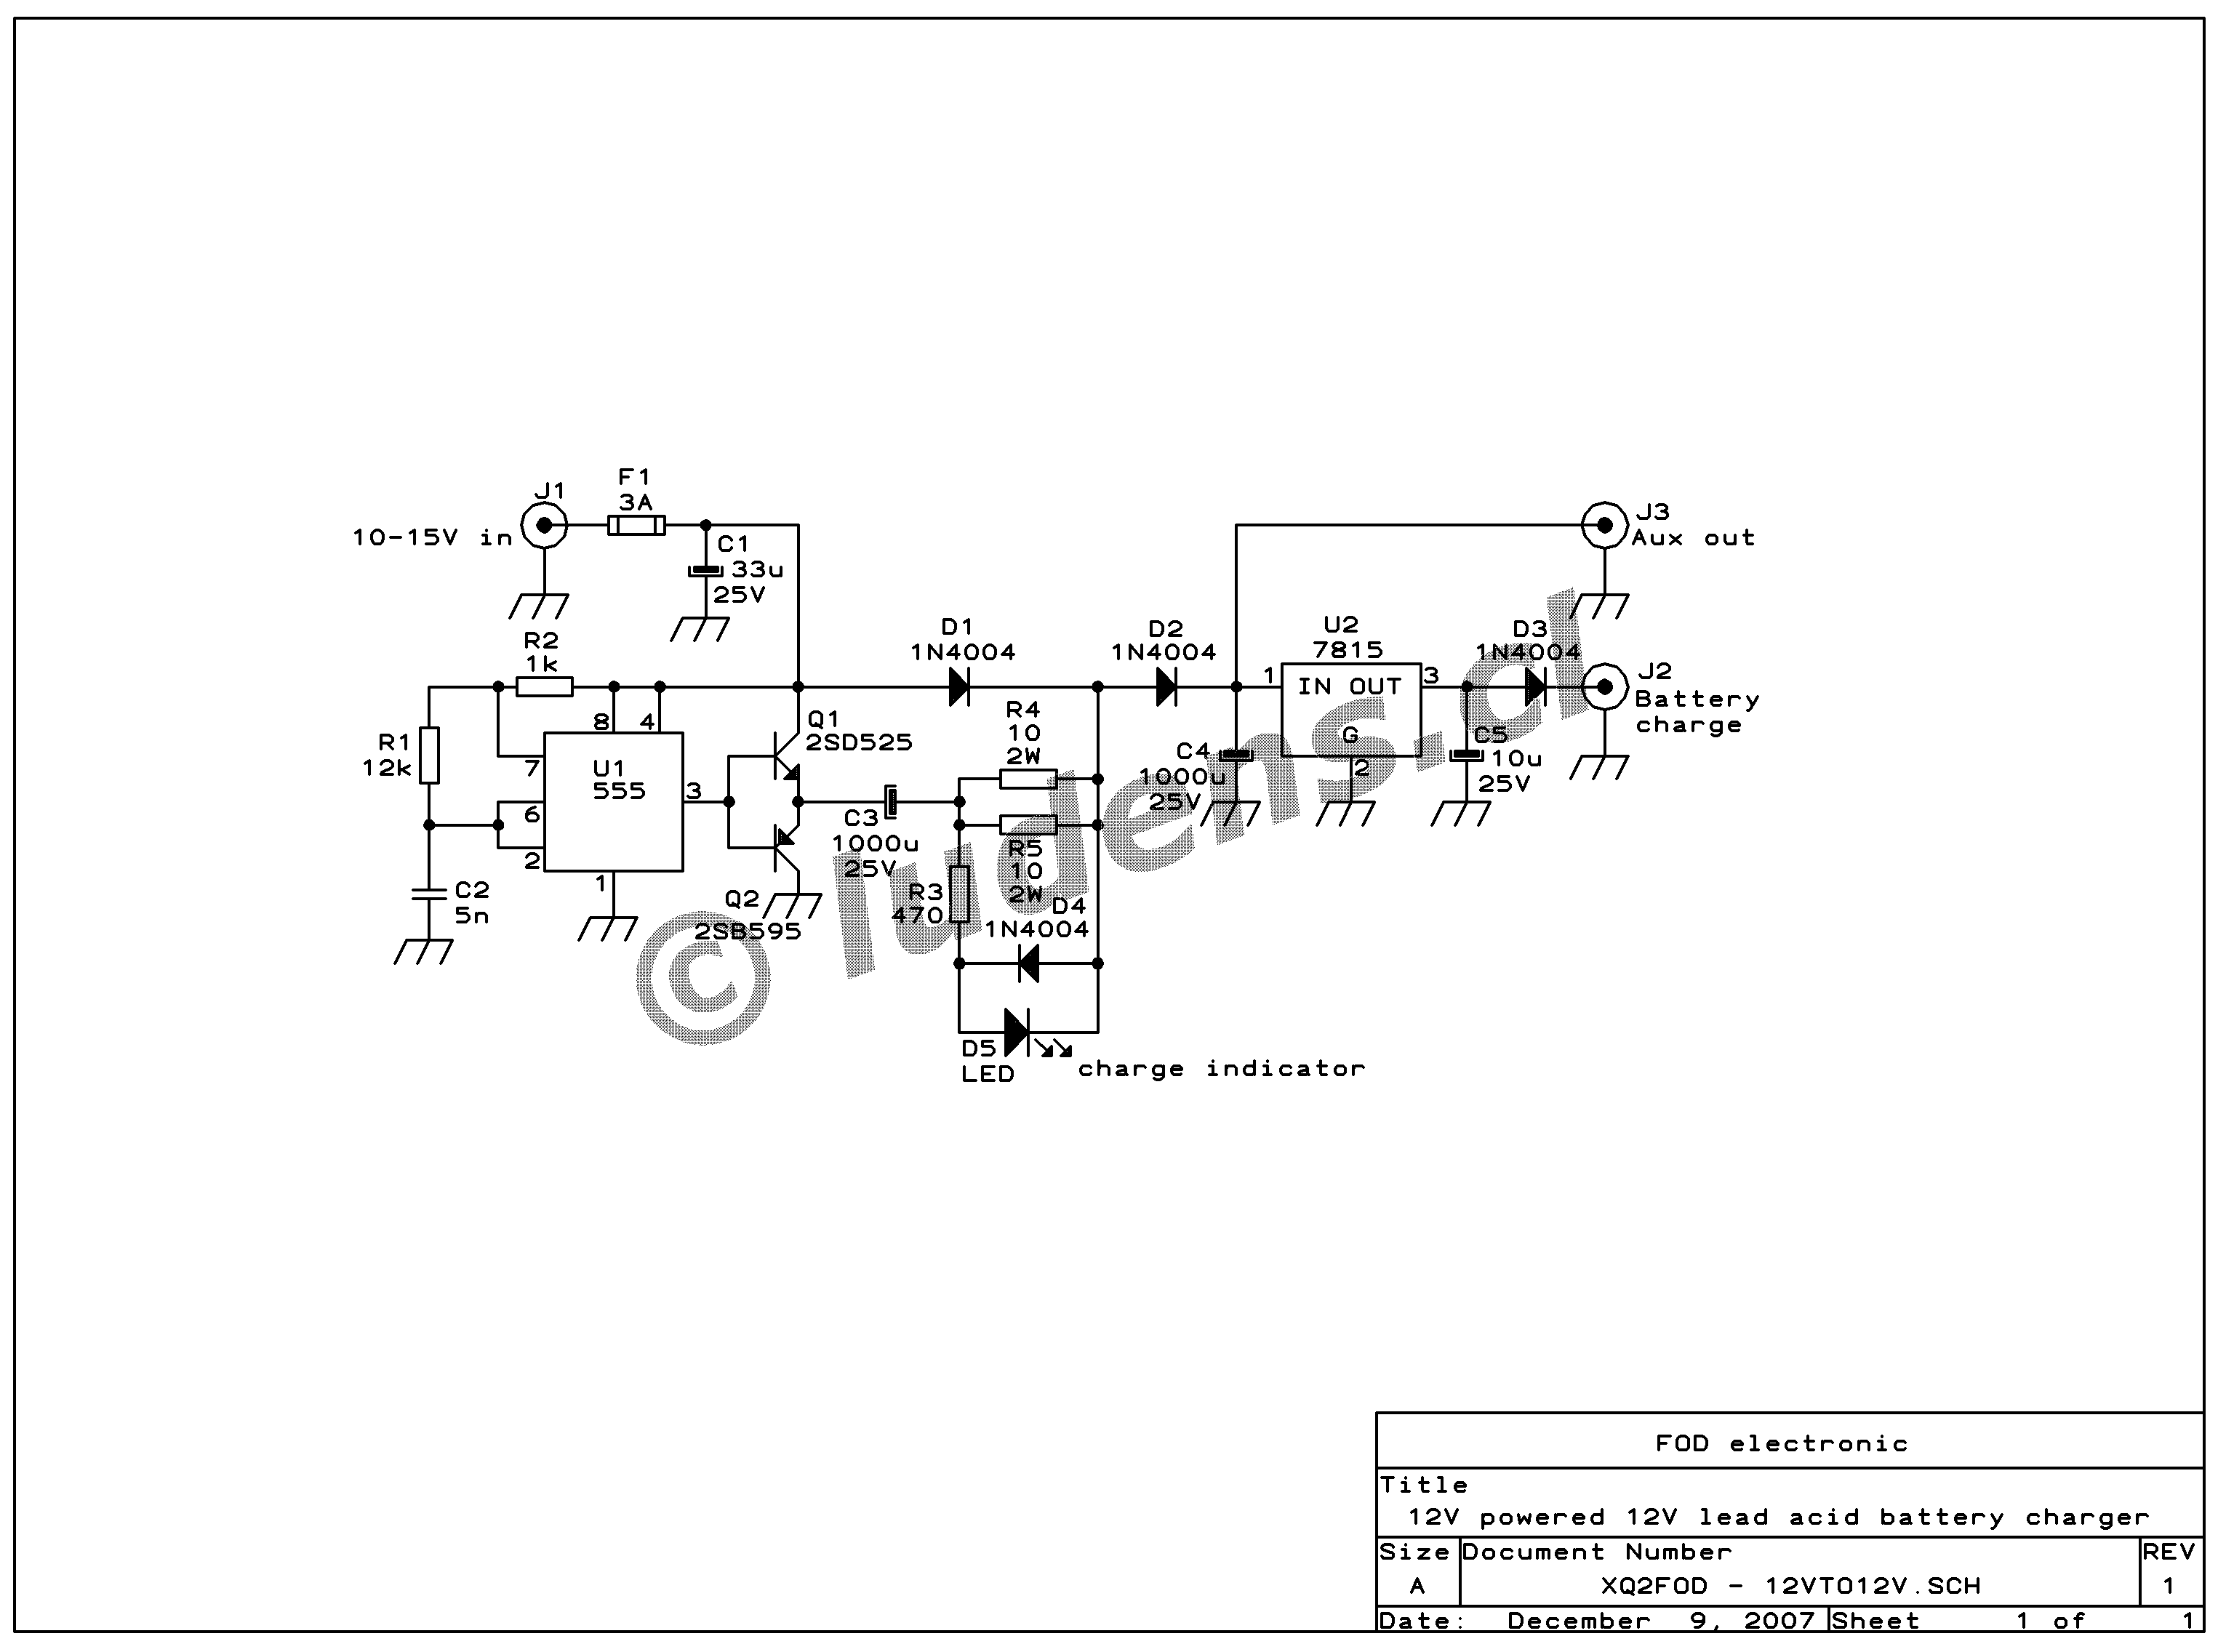
You can click this schematic to obtain a high resolution, printable version.
The charger consists of two stages: The first is a capacitive voltage doubler, which uses a 555 timer IC driving a pair of transistors connected as emitter followers, which in turn drive the voltage doubler proper. The doubler has power resistors built in, which limit the charging current.
The second stage is a voltage regulator, using a 7815 regulator IC. Its output is applied to the battery via a diode, which prevents reverse current and also lowers the voltage a bit. The resulting charge voltage is about 14.4V, which is fine for charging a gelled or AGM battery to full charge, but is too high as a trickle charger, so don't leave this charger permanently connected to a battery. If you would like to do just that, then add a second diode in series with D3!
There is a LED connected as a charge indicator. It will light when the charge current is higher than about 150mA. The maximum charge current will be roughly 400mA.
There is an auxiliary output, that provides about 20V at no load (depending on input voltage), and comes down as the load increases. I included this for charging 12V, 4Ah NiCd packs, which require just a limited current but not a limited voltage for charging.
Note that if the charge output is short-circuited, the overcurrent protection
of U2 will kick in, but the current is still high enough to damage the
diodes, if it lasts. So, don't short the output! If instead you short the
auxiliary output, the fuse should blow.
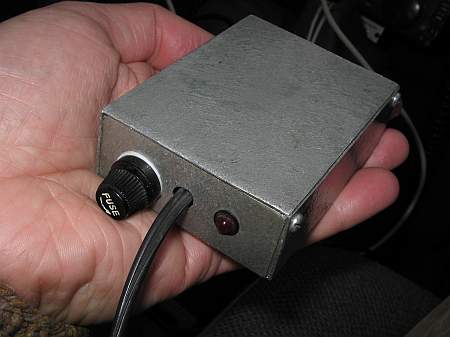
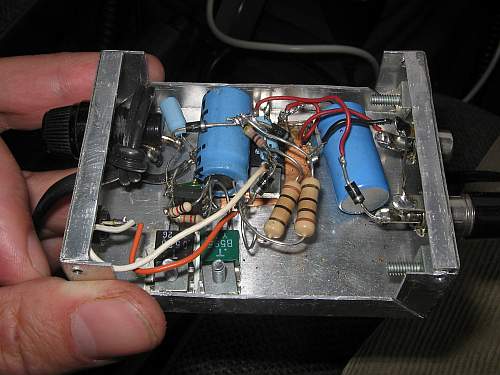 I
built this charger into a little homemade aluminium sheet enclosure, using
dead-bug construction style. Not very tidy, but it works. Note the long leads on
the power resistors. They are necessary, because with shorter leads the
resistors will unsolder themselves, as they get pretty hot!
I
built this charger into a little homemade aluminium sheet enclosure, using
dead-bug construction style. Not very tidy, but it works. Note the long leads on
the power resistors. They are necessary, because with shorter leads the
resistors will unsolder themselves, as they get pretty hot!
The transistors and the regulator IC are bolted to the case, which serves as heat sink. The transistors don't heat up very much, but the IC does.
This little charger has served me well during many
years, charging my fluorescent camping lantern, the
model airplane starting battery, the flying machine battery, etc, all of these described elsewhere
on this site.
Back to the homo ludens electronicus
page.